
Tool Information
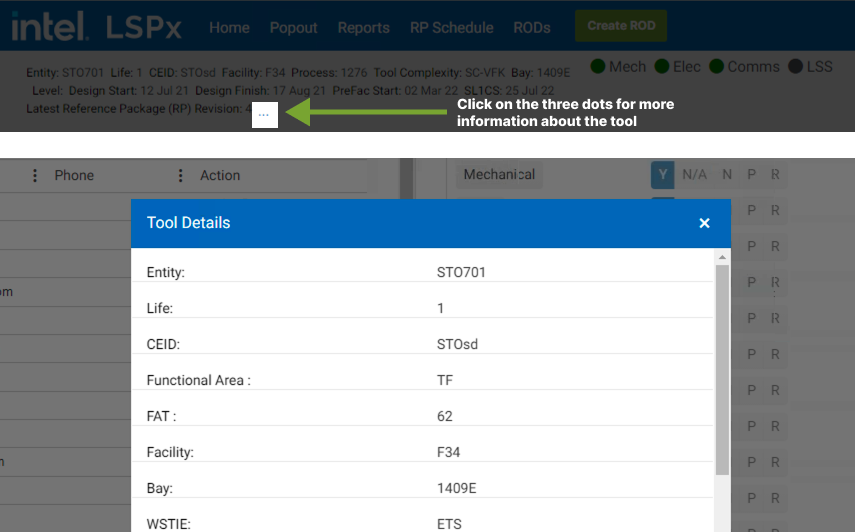
Some informtaion about the tool are displayed on the top-left side [Entity Code, Life, CEiD, Process, Bay, Level, Complexity etc.]. Click on the three does to open the Tool Details popup.
Stakeholders
The stakeholders section of the Tool Details page contains the list of People and Companies responsbile for the tool. It's important to keep the stakeholders up to date because the information you see here automatically feeds into the DACs, DCRs and RODs in the LSPx application.
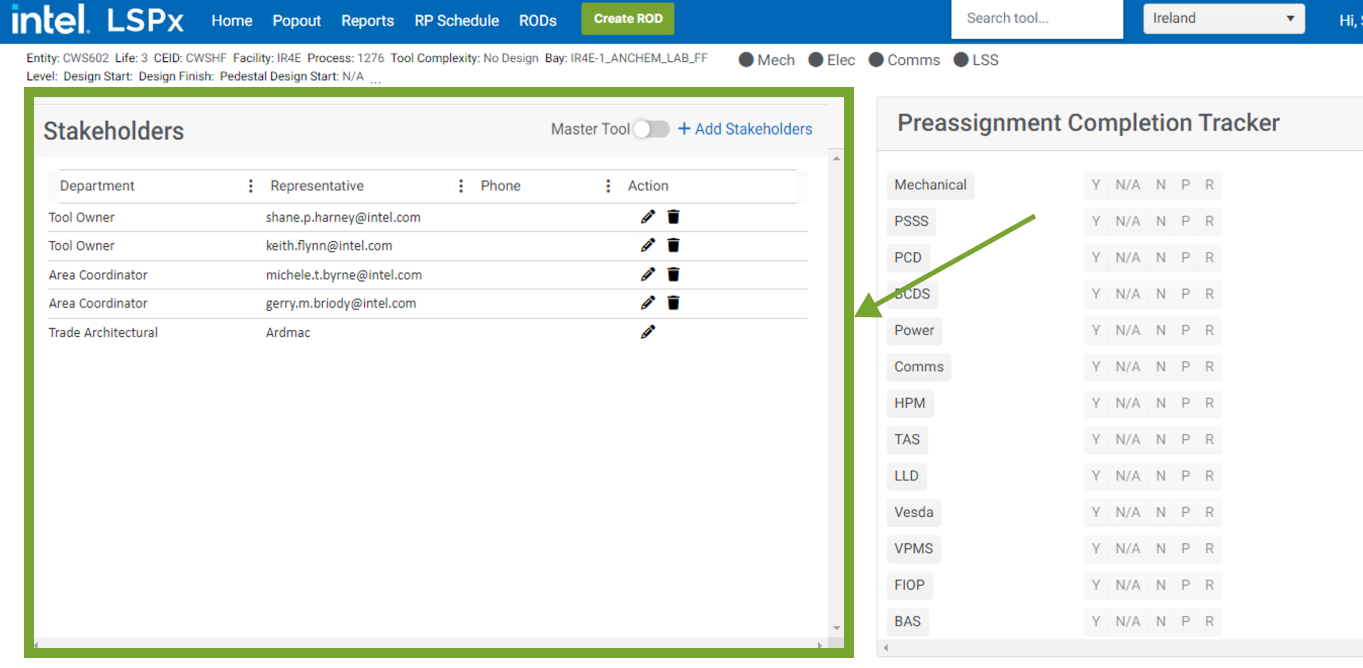
The AE Firm is the design company assigned to the tool as displayed on the Stakeholders on the Tool Details page. The AE Firm assigned in the POR Schedule automatically appears in the Stakeholders section. If the POR Schedule has any inaccuracies for the AE Firm, the data here will reflect those errors, even if it is manually updated in LSPx. There is an ongoing discussion to implement a new logic that will retain any manual updates in LSPx.
The table below provides details about the roles that can update the People and Company on the Stakeholders in LSPx.
| Role | Add | Edit | Delete | Additional Information | |
|---|---|---|---|---|---|
| 1 | Stakeholder Admin | ✅ | ✅ | ✅ | Can manage the AE Design Leads, Area Coordinators, IE, Project Managers, Tool Owners, AE Firm, and Trade Companies |
| 2 | AE Design Lead | ✅ | ✅ | ✅ | Can manage the AE Design Leads, Area Coordinators, IE, Project Managers, Tool Owners, AE Firm, and Trade Companies |
| 3 | Area Coordinator | ✅ | ✅ | ✅ | Can manage the Area Coordinators and Tool Owners only |
| 4 | All other roles | ❌ | ❌ | ❌ | Do not have permissions to manage any user or company on the Stakeholders |
Adding Stakeholders
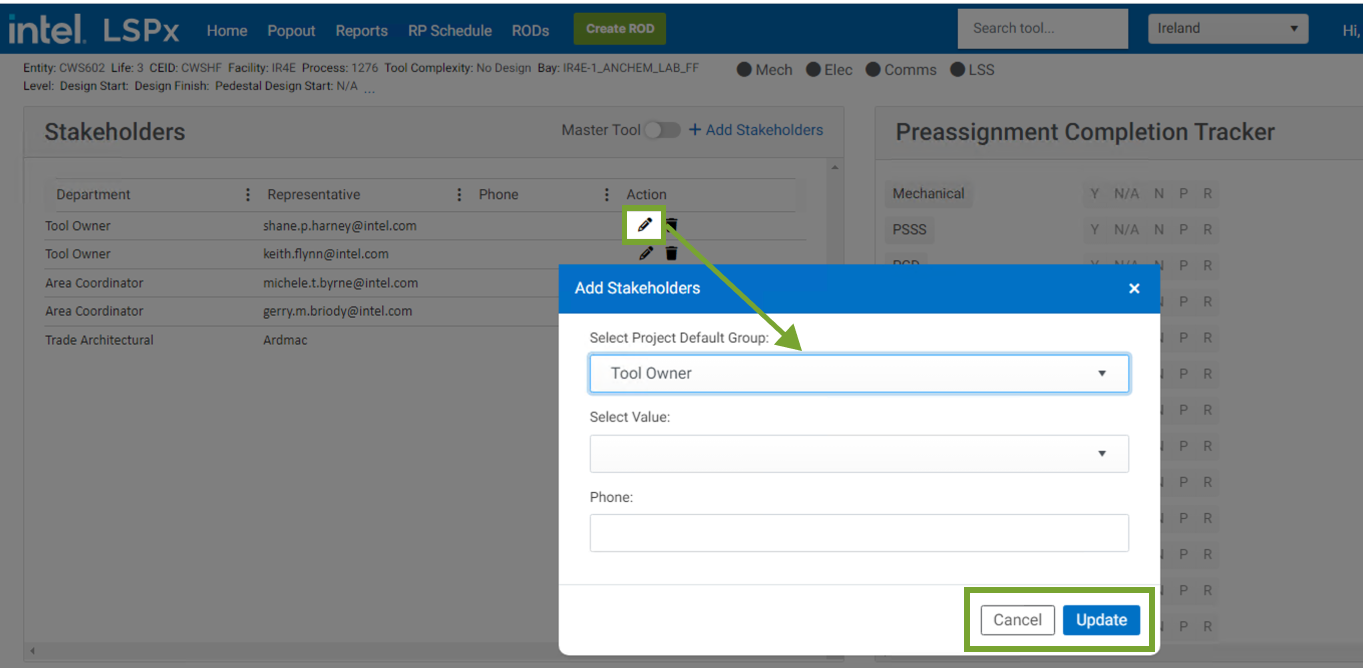
Click on Add Stakeholders button to add a new stakeholder or company. Select the project default group and value in the add stakeholders pop-up window and add.

Editing Stakeholders
Click on the Edit icon adjacent to the stakeholder record, you want to update the record. Update the project default group and value in the add stakeholders pop-up window.
Deleting Stakeholders
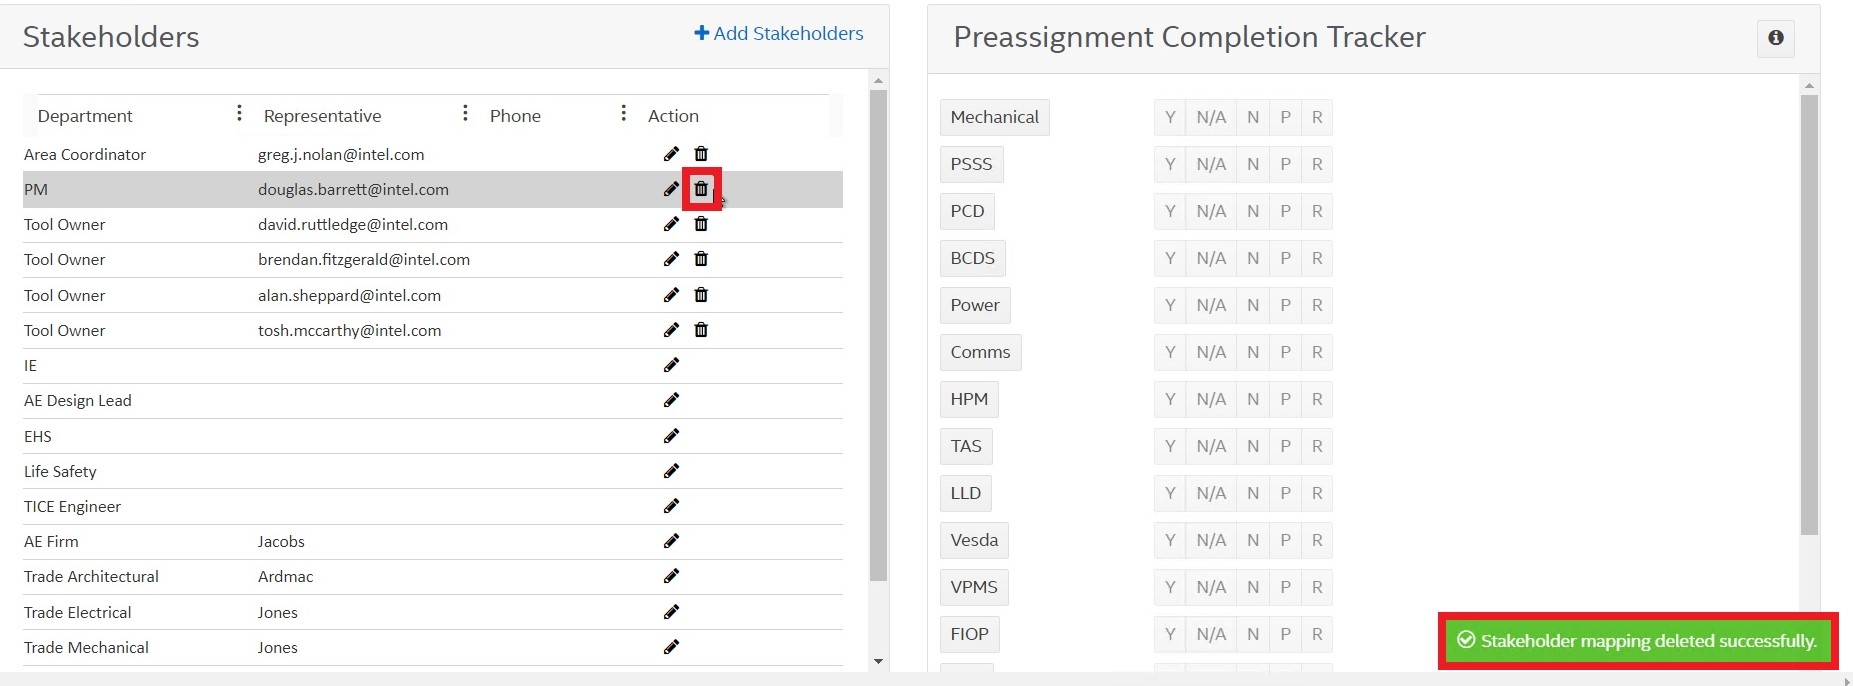
Upon clicking the Trash icon adjacent to any stakeholder record, the record will be deleted. A notification message confirming “Stakeholder mapping deleted successfully” appears after deleting the record.
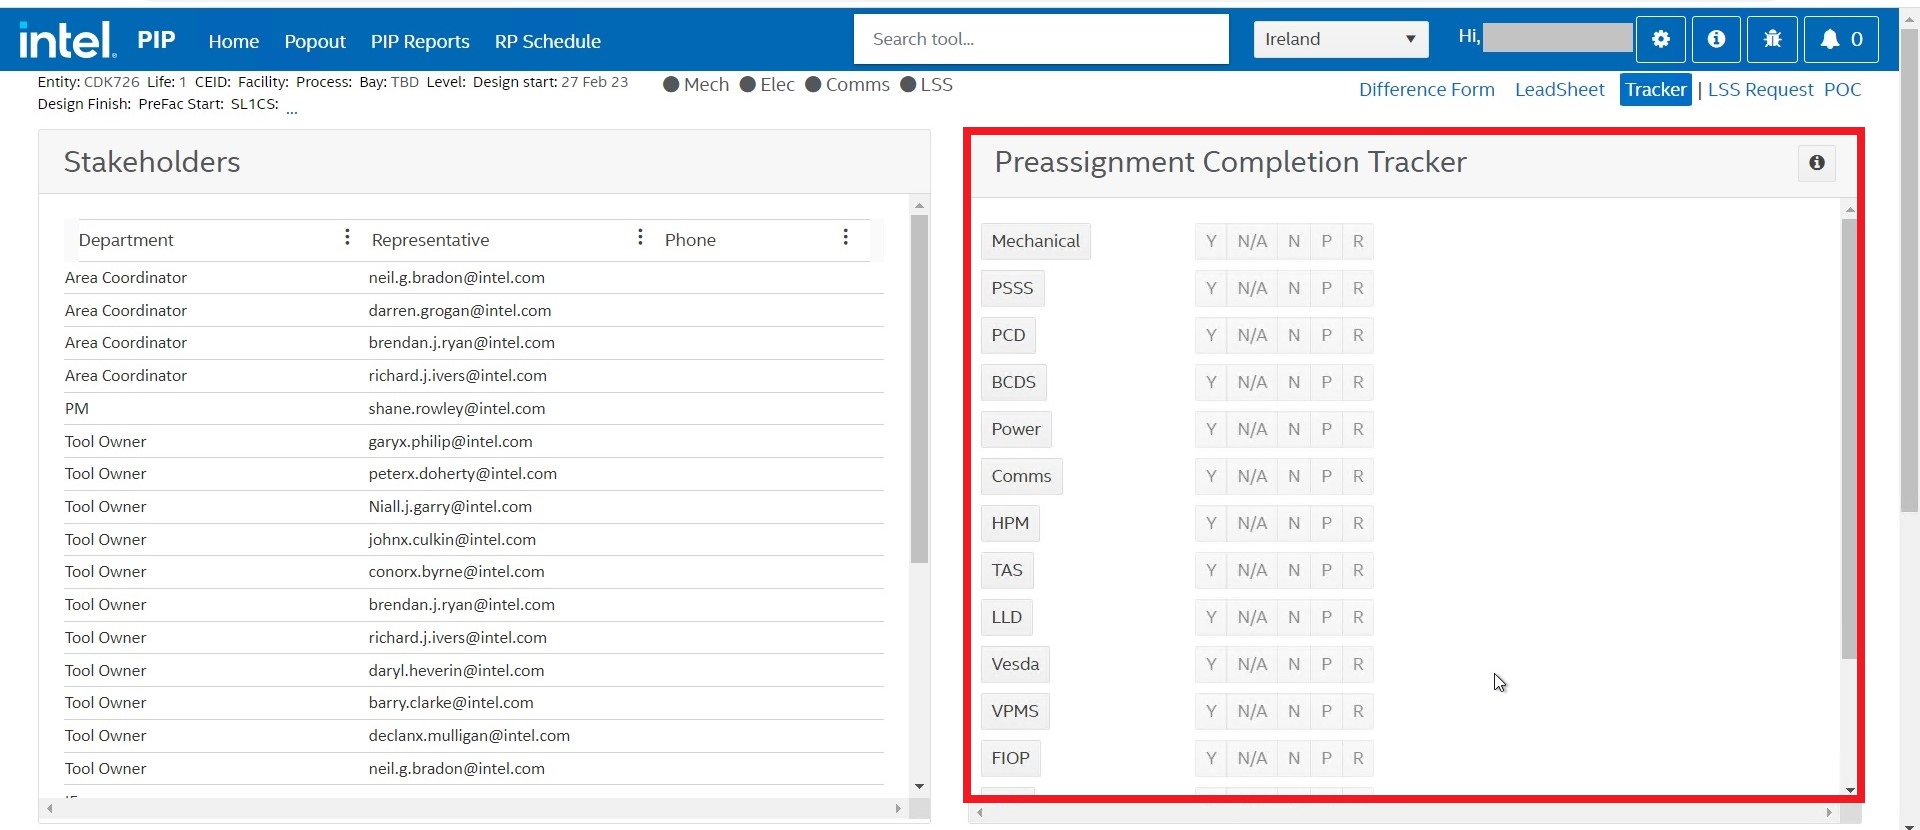
Preassignment Completion Tracker
The Pre-assignment Completion Tracker is limited to a few roles such as the Integration Team members. Refer to the [Permissions guide] for the roles that have access. You can select one of the following for each Discipline below:
Yes (Y) - The tool requires assignment under this discipline
Not Applicable (N/A) - The tool has no requirement for this discipline.
No (N) - A gating infrastructure issue needs to be resolved.
Pending (P) - Waiting for no gating information from stakeholders.
Review (R) - Need review because of Bay or CEiD changes.
Apply to MOK Tools
This button appears on First of a Kind (VFK) tools and can only be accessed by the Integration team members. When clicked, you will be asked to confirm that you want to apply the N/A selection on the VFK to MOK tools. When confirmed, only the N/A selections from the VFK will be transferred to the MOK tools that have never had a selection.
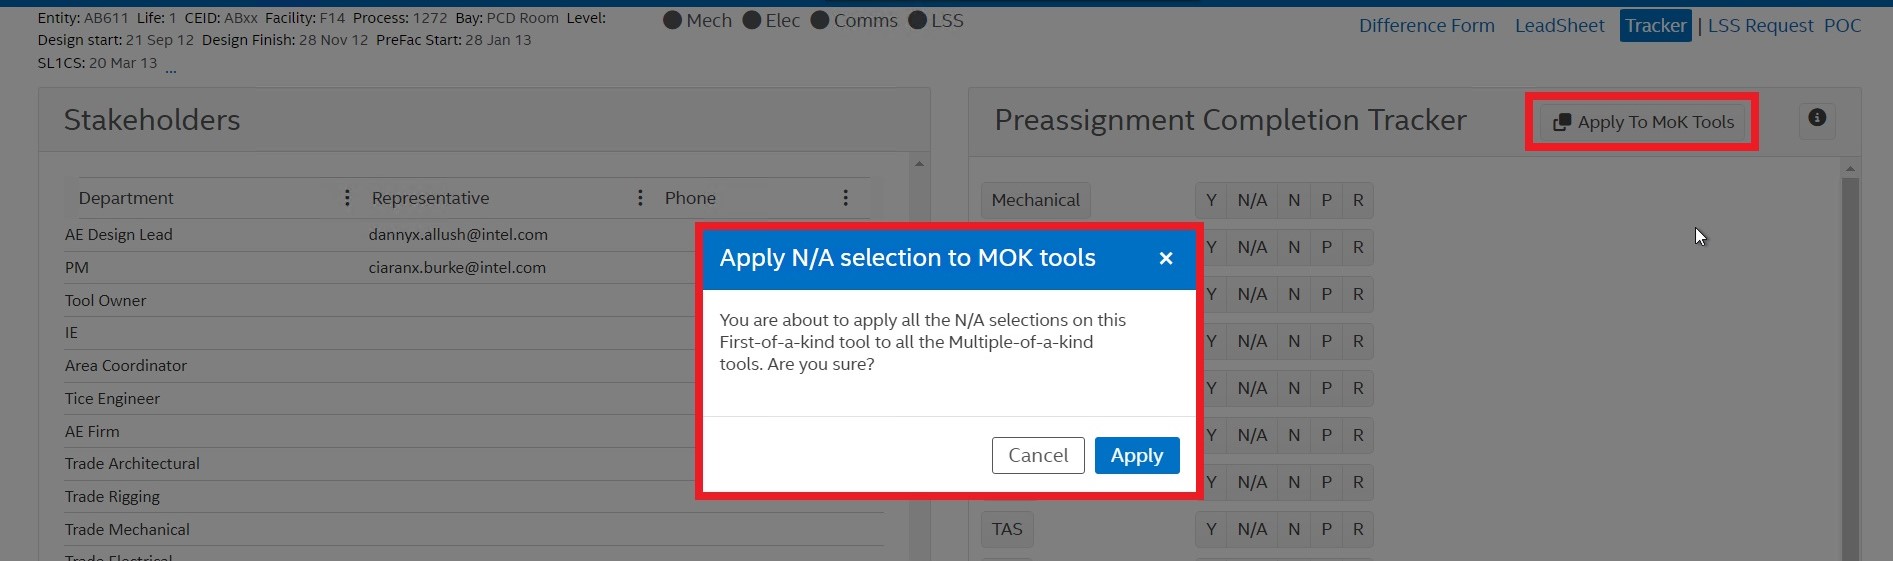
The system uses a combination of the information to determine the tool that is the VFK: Process, CEiD, Site, and the tool with the First Design Start Date is determined to be the VFK
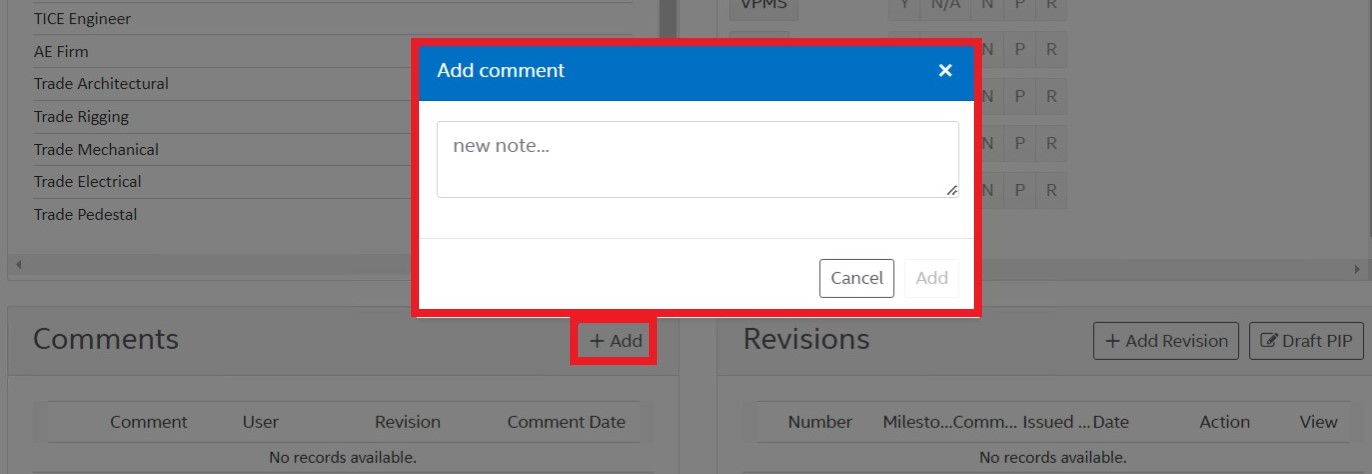
Comments
In this section, all the comments made on a tool are displayed including the comment, the user who has made the comment, the revision, and the comment date.

Add Comment
A user can add a new comment by clicking the Add button.
Delete Comment
To delete a comment, click on the corresponding Delete (Trash) icon and a delete confirmation will pop up. If you are sure to delete the comment, click on the Yes button and the comment will be removed.

Revisions
In this section, all the changes made to an LSP of the tool are displayed including revision number, milestone, comment, issued by, date, etc.
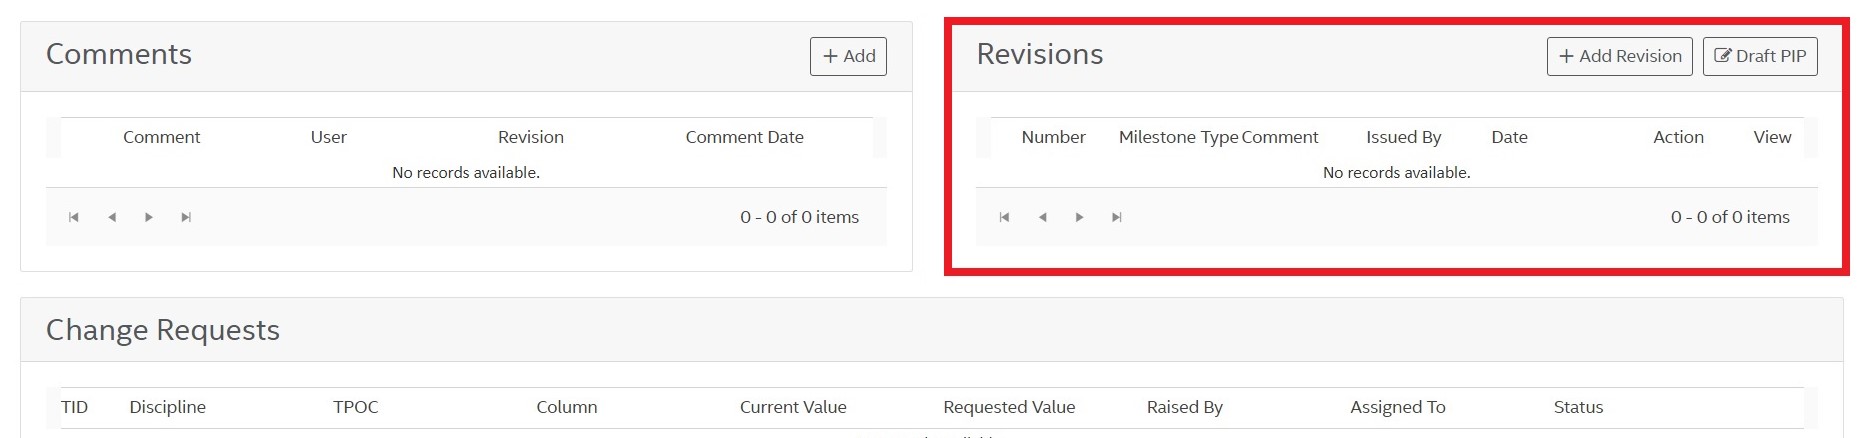
The user can also perform the following functions on a revision in this section:
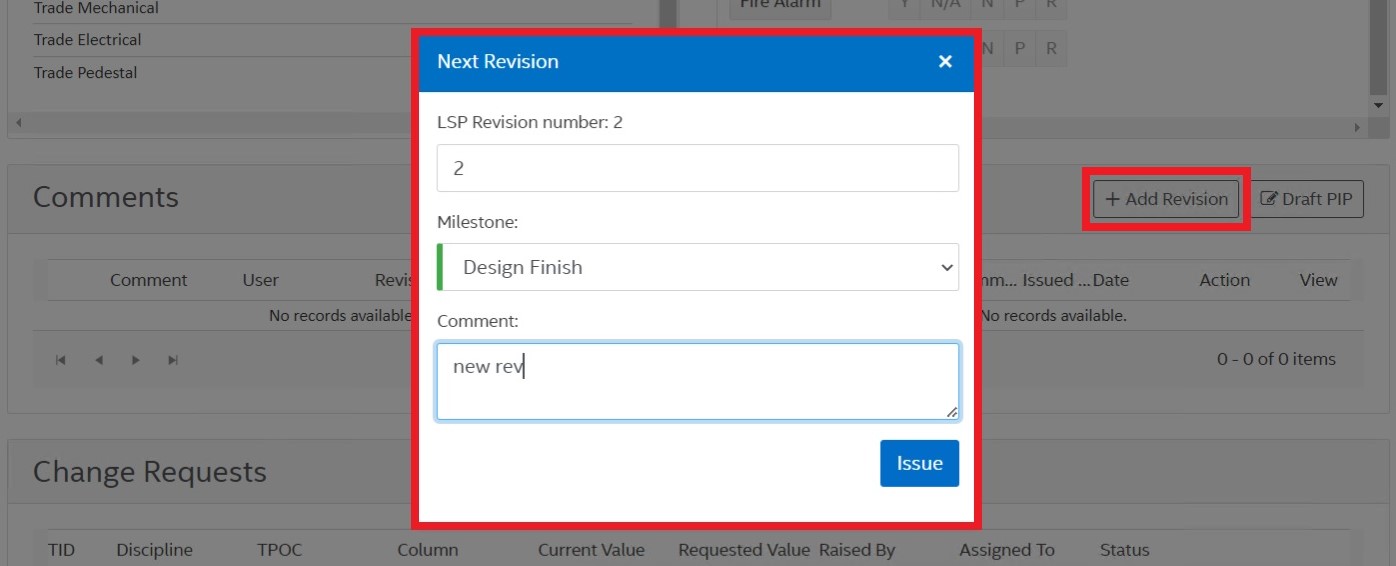
Add Revision
Click on Add Revision button to create a new revision by entering the LSP revision number, Milestone, and comment. Upon clicking the Issue, the revision will be created and a revision history Excel sheet will be downloaded to your system.
A tool owner can approve or reject a revision after reviewing the drawing.
Draft PIP
The Draft PIP button is used to create a draft of the drawing before sending it for review so as to analyze it before creating a revision. It will only download the Excel file on the user’s local computer; no record of this Draft will be added to the Revision tile.

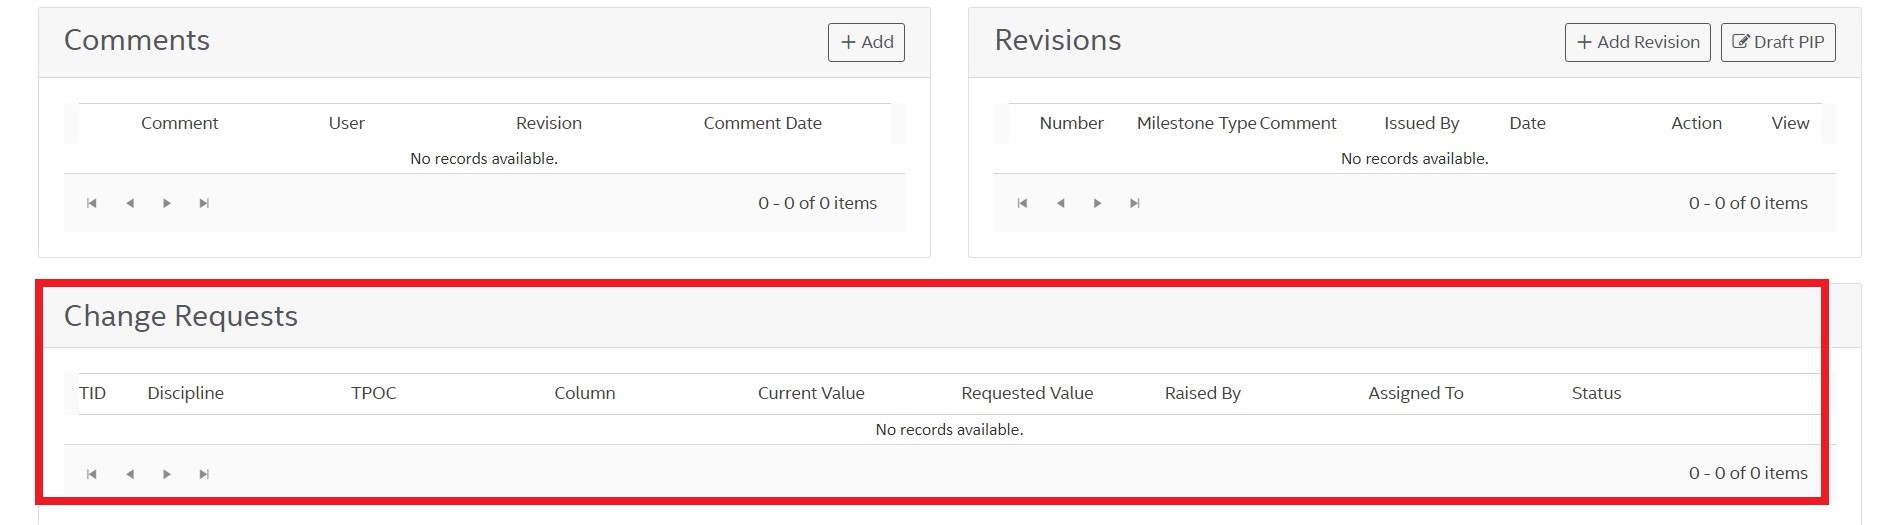
Change Requests
This section enlists all the DMR requests based on the tool that the user sends.
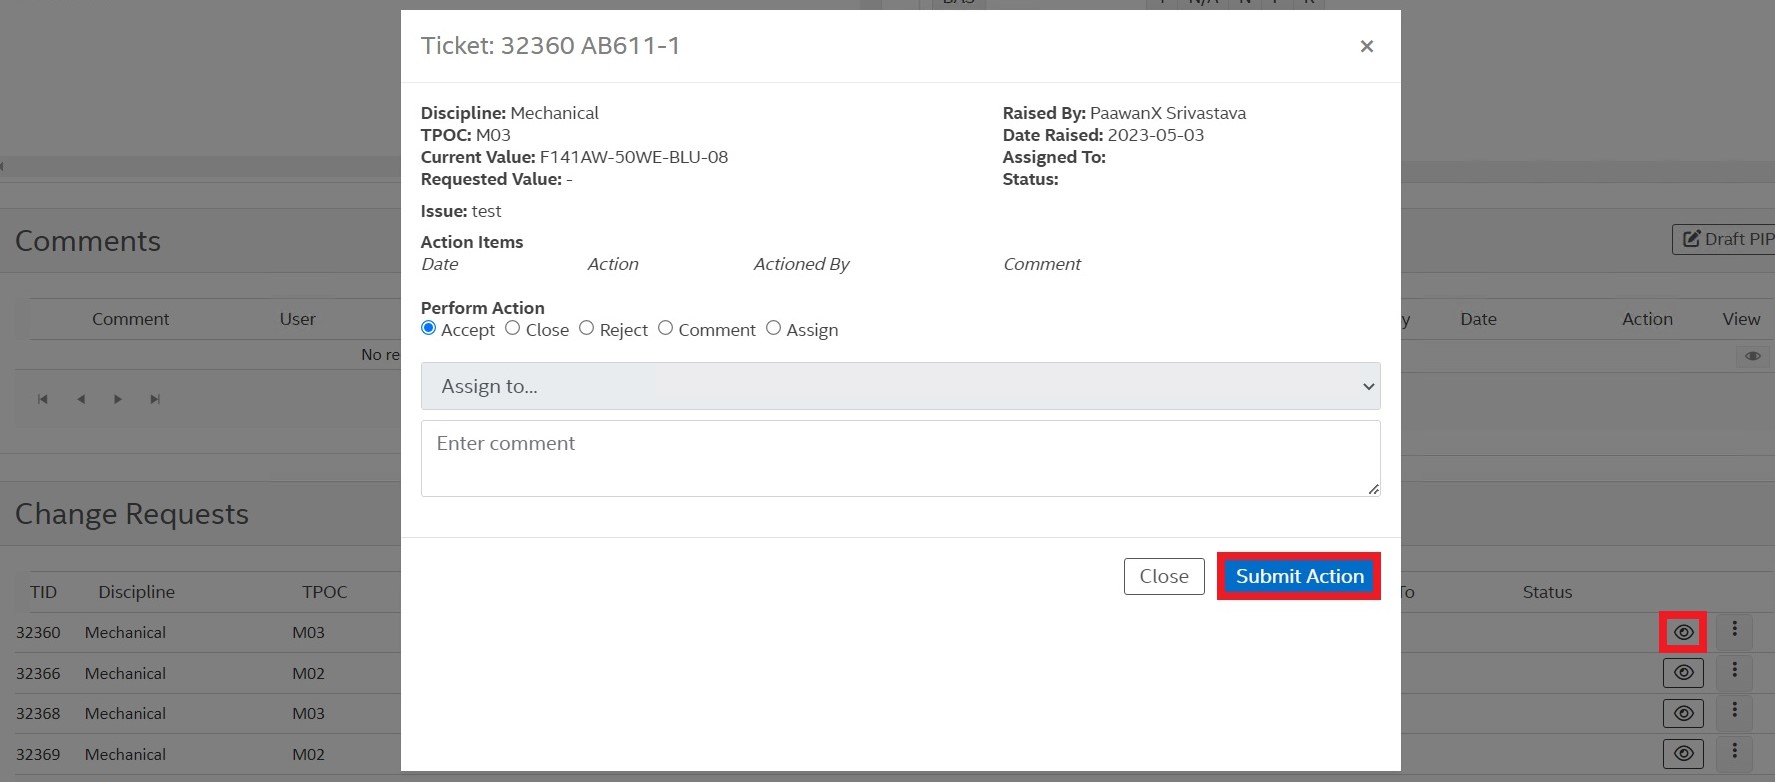
View
Click on the view icon (eye) to find the request details and take action such as accept, reject, assign, close, and comment on a request.
Click on Submit Action to save the action taken.
Action
The user can take an action such as accept, reject, assign, close, and comment on a request by clicking on the adjacent vertical ellipsis.

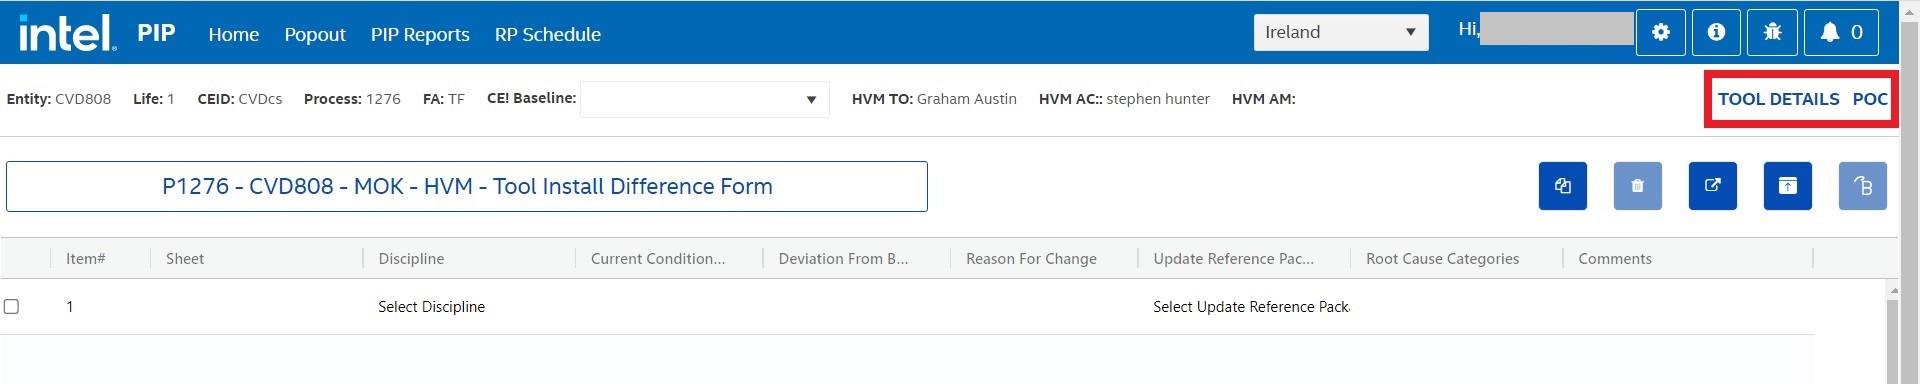
Difference Form
The difference form can be accessed from the top-right corner of the tool details page. Upon clicking the Difference Form, it redirects to the difference form of a tool.

The form lists the differences between a Reference Package [RP]/ the copied tool from the tool that needs to be installed. It means that while installing a tool one has to follow the copied tool but with the differences listed in the difference forms.

The user can perform the following functions in a difference form:
a. Add Items
Users can add items by clicking on a new row of the grid.
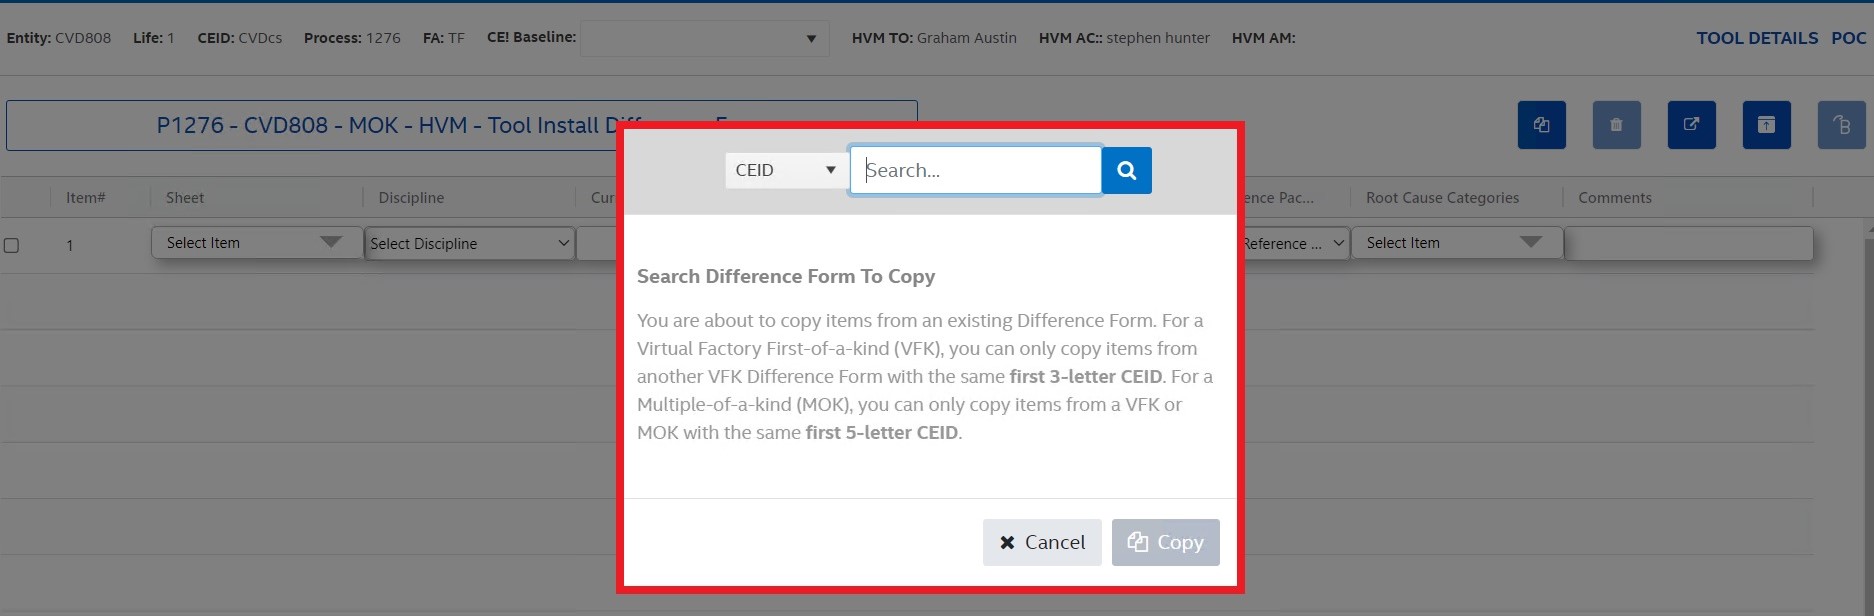
b. Search & Copy
Allows the users to search and copy an existing Difference Form. The user is able to copy a Difference Form for a tool with the same first 3-letter CEID. The user can copy First-of-a-kind [FOK] and Multiple-of-a-kind [MOK] Difference Forms.
A tool's first instance of a Difference Form must be referred to as the First-of-a-kind [FOK] Difference Form. The subsequent Difference Forms [with the same process and CEID] must be referred to as Multiple-of-a-kind [MOK].
c. Delete
Allows the users to delete items. Deleted items get removed from PIP and stored in the database, and labeled as deleted.
Deleted items must appear on a new Sheet of the next Difference Form revision [Exported and Published Excel] file called “Deleted Items”.
d. Export
Allow users to export Difference Form into Excel format.
e. Publish
Allow users to publish the Difference Form to the correct folder path in BIM360. The system will be able to automatically identify where the Difference Form will be published after the user logs in.
For this process to be effective, there is a need to utilize the 3-Legged Authentication to ensure the user has the correct permissions to publish to BIM360. The 3-Legged Authentication makes it possible to identify the user that has published the file.
Switching to Tool Details or POC
The user can get back to the tool details page or switch to a POC detail page by clicking the corresponding buttons placed in the top-left corner of the Difference form.
LeadSheet
The LeadSheet section can be accessed from the top-right corner of the tool details page. It opens a list of all the template drawings that are used in a tool in the top-right area of the tool details page. The references to the drawing files are copied to the tool when a DAC is issued for a tool.
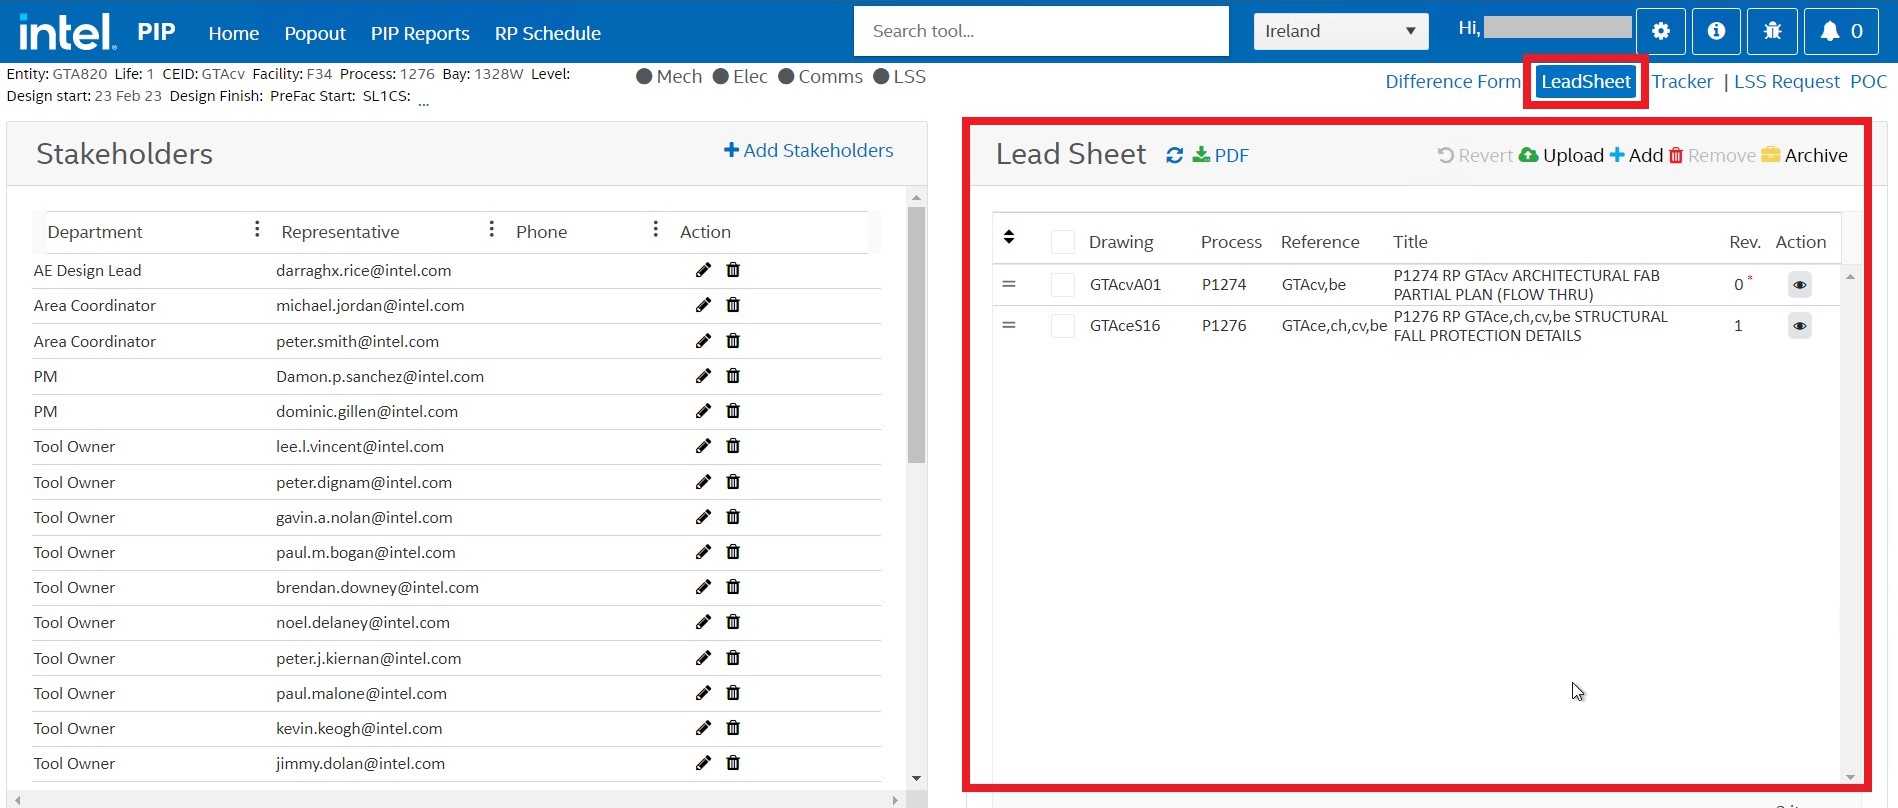
The user can perform the following functions on a lead sheet:

a. Preview
The user can preview any drawing by clicking the Preview icon placed adjacent to each drawing.
b. Upload
Click on the Upload button to upload a drawing from the local computer on the BIM360 and the reference to that drawing will get added to the Leadsheet.
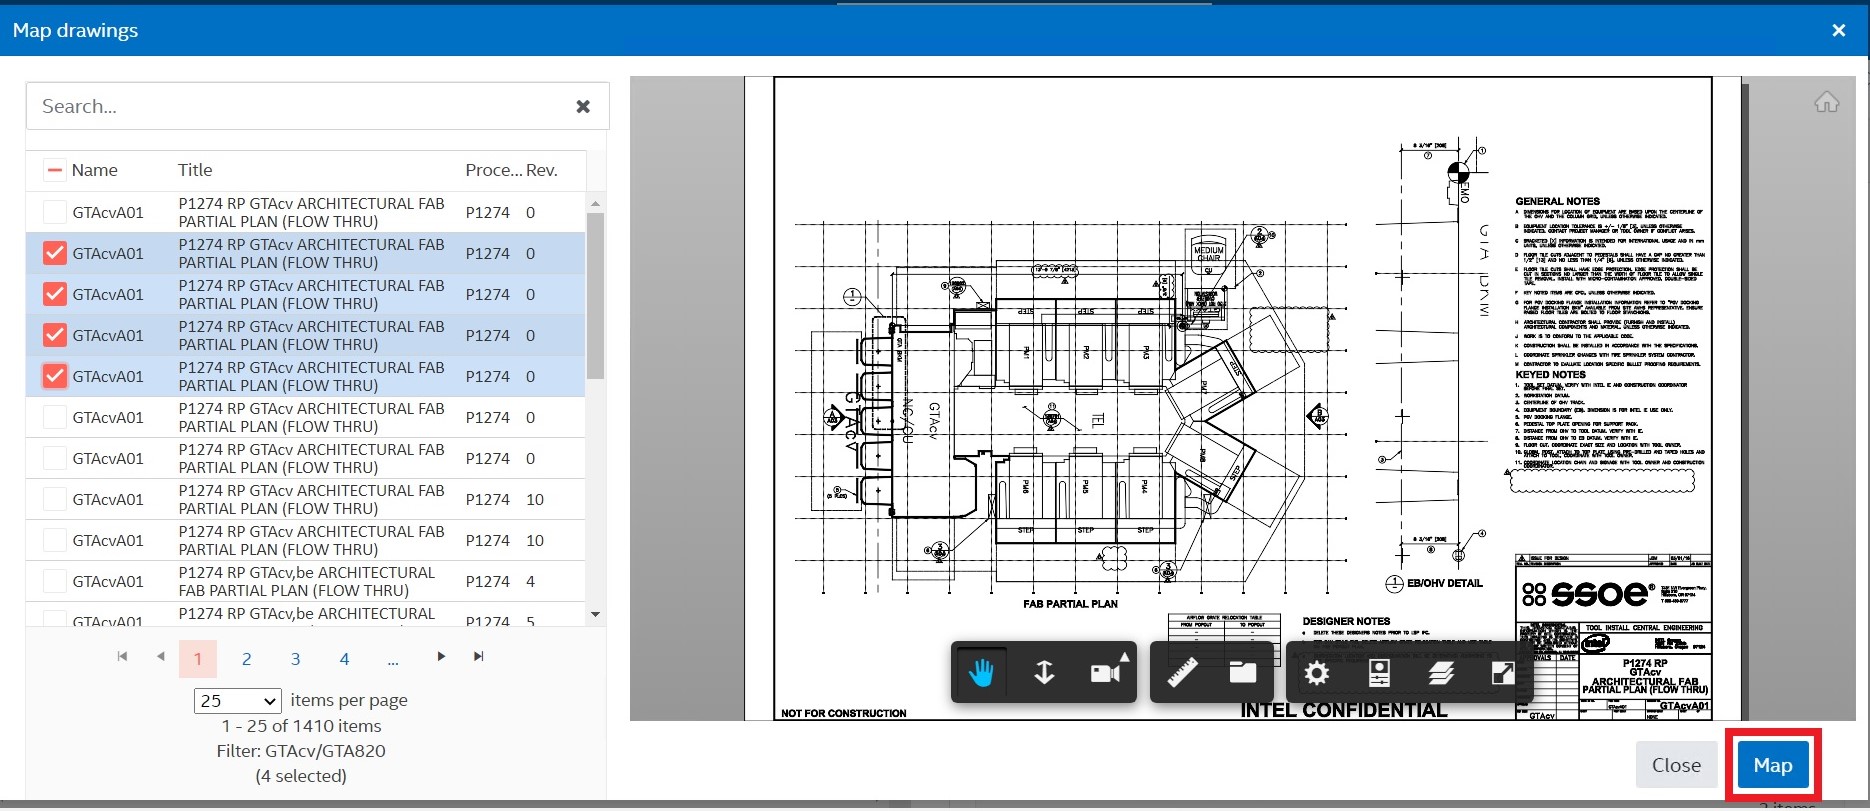
c. Add
Click on the Add button, it opens a new Map Drawings window. Select the drawings for which you want to add the references to the lead sheet and click Map.
d. Remove
Click on the Remove button to remove all the selected drawings from the lead sheet. The removed drawings will move into the Archive folder of the system.
e. Archive
Click on the Archive button to display the list of all the drawings available in the archive. The user can select any number of files from here that need to be restored and once selected, clicking the restore button will add all the selected drawings back into the Lead Sheet.
f. Generate PDF
Once the user is satisfied with all the drawings that are there in the lead sheet, the user can click the Generate PDF button to create a PDF.
g. Download PDF
Click on the Download PDF button to download the PDF into the local computer.
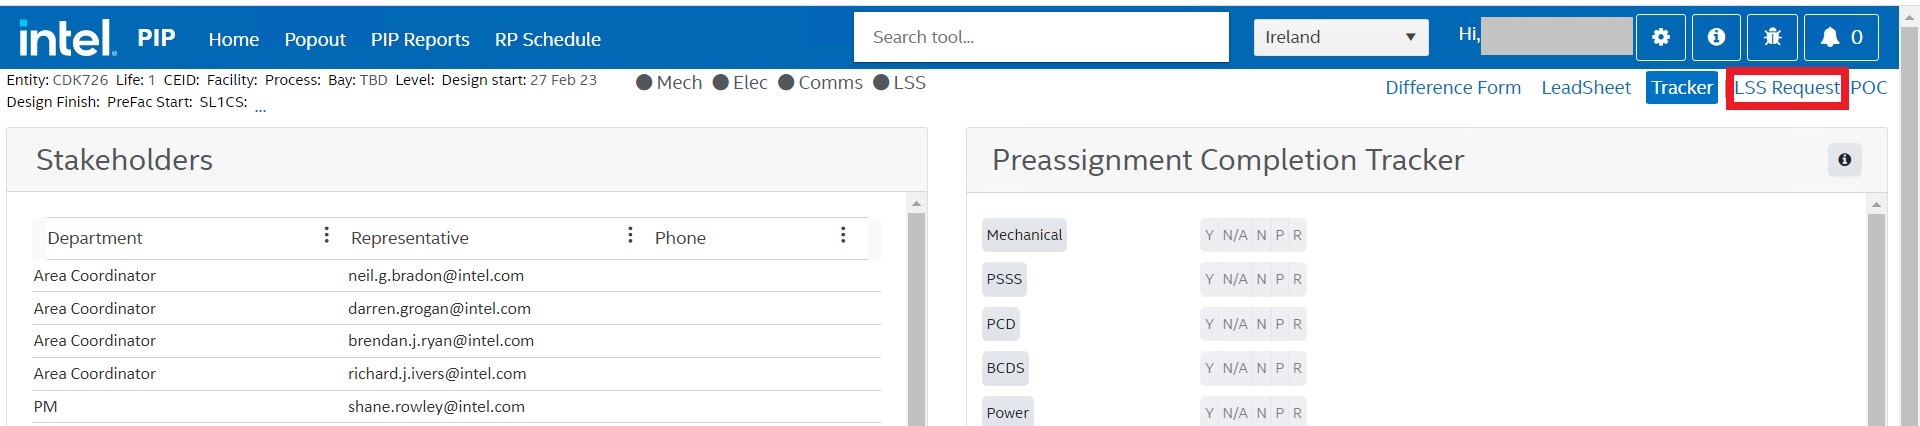
LSS Request
Upon clicking the LSS Request button from the top-right corner of the tool details page, the user will be redirected to a new page from where the user can view the submitted Requests and add LSS POCs.
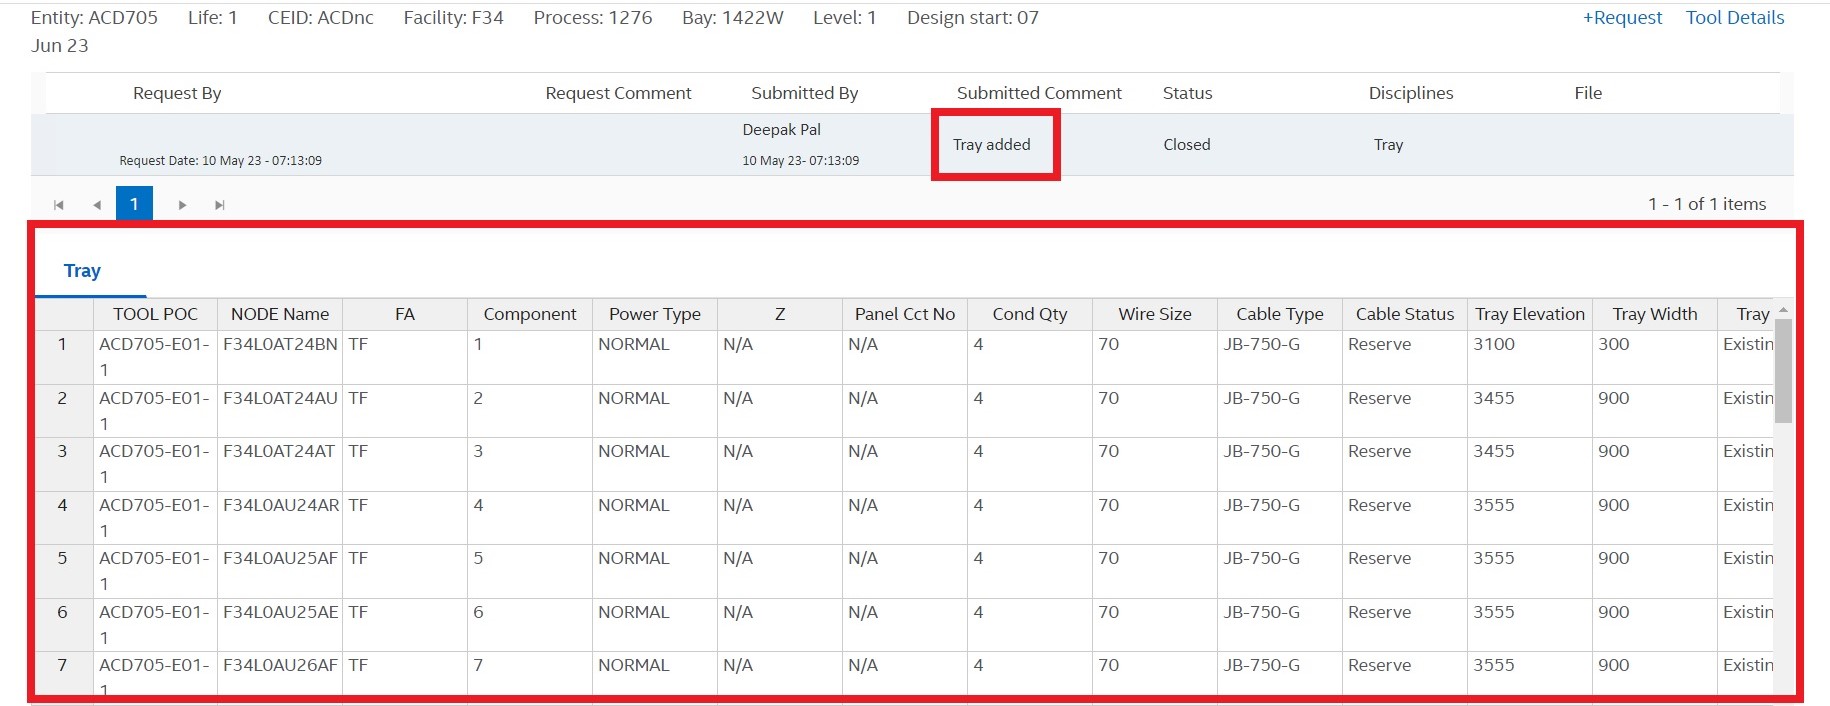
Submitted Requests
The submitted requests will be displayed on the upper section of the page and if any element gets added, it will display in the grid.
For example, in the image below a request has been submitted on “Tray Added” and the data of Tray is being displayed in the grid including the attributes such as TOOL POC, NODE Name, FA, Component, Power type, Wire Size, and more.
The main functionalities on the LSS request page are as follows:
Delete & Restore
By clicking on the Delete button from the bottom-right corner of the grid, a request can be deleted.
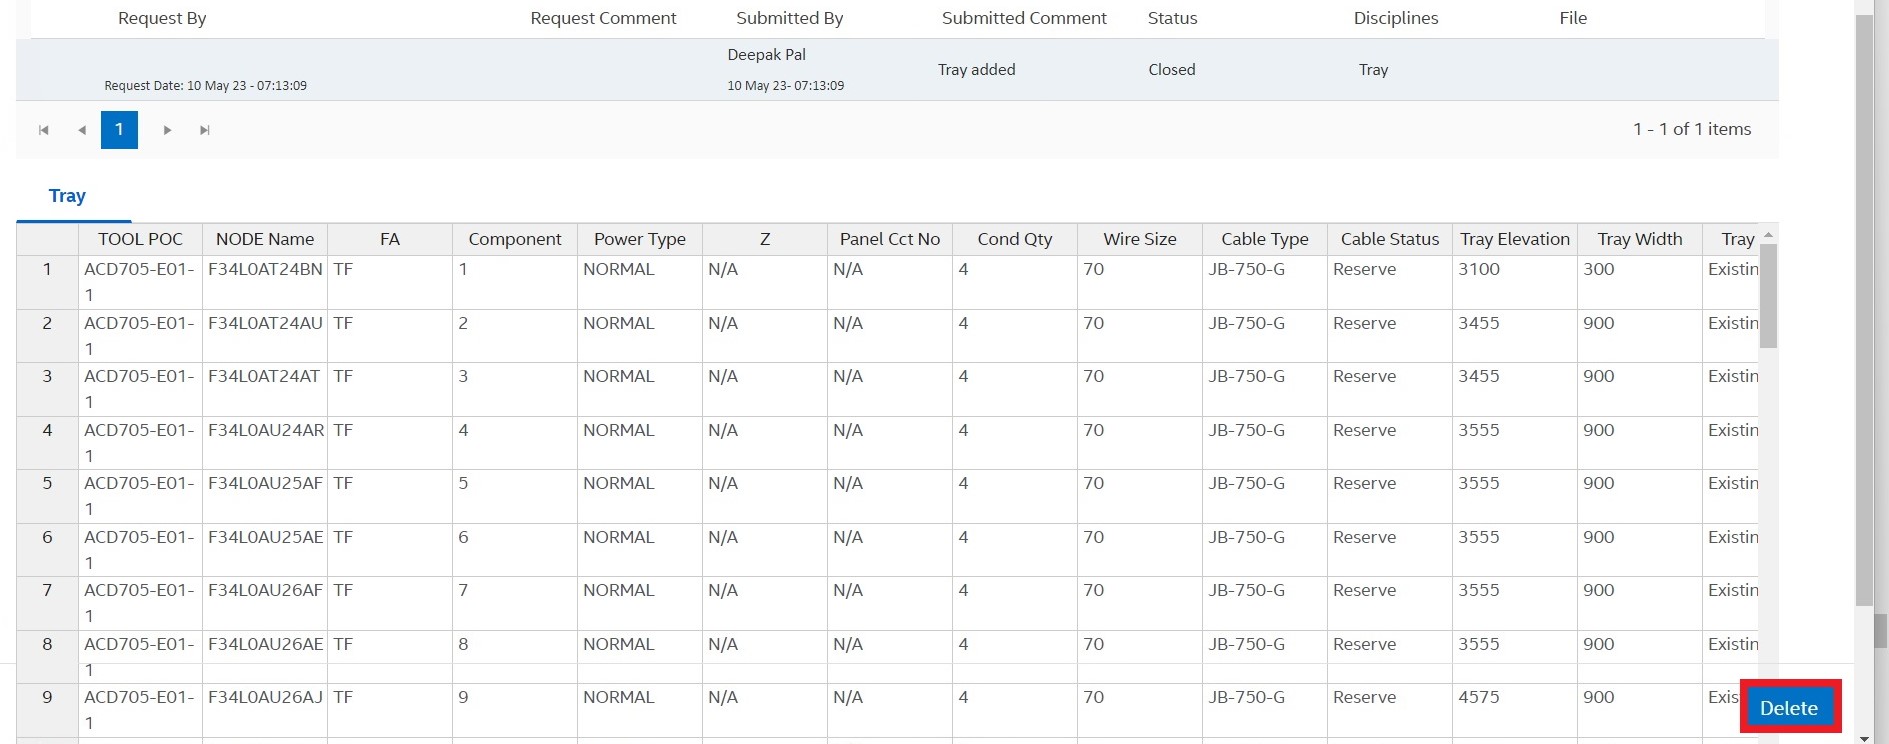
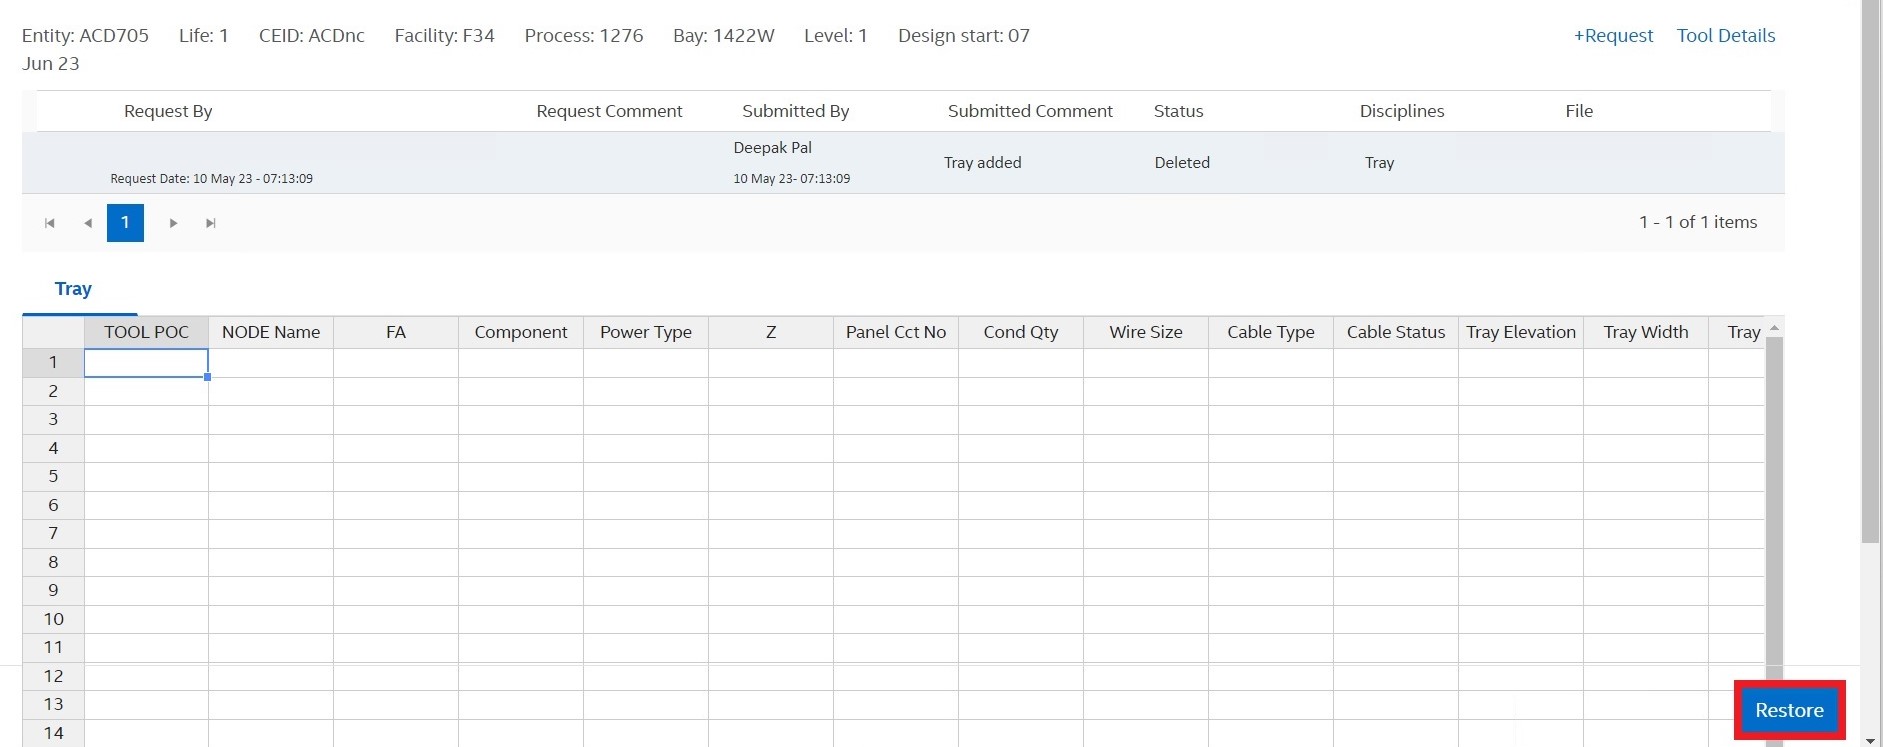
Once the request gets deleted, all the data in the grid will also get removed and the request status will change to Deleted from Open.

If any request is deleted, the Restore button will be enabled to recover the data in the grid and the request status will also become Open again.
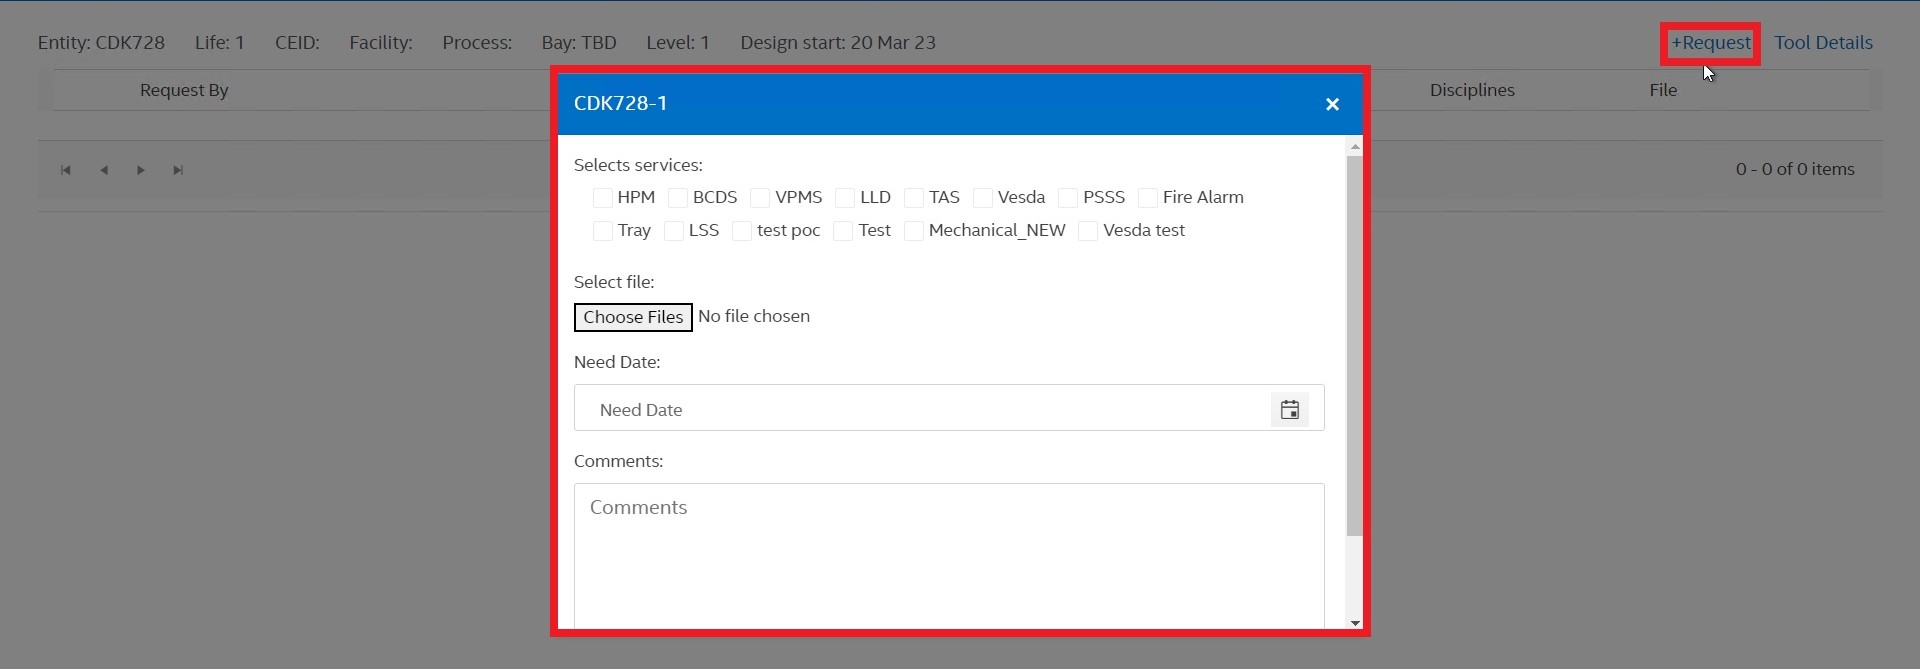
Request
By clicking on the Request button, the user sends the request to add LSS POCs to the tool.
Tool Details
The user can navigate back to the Tool Details page by clicking the Tool Details button.

POC
Clicking the POC from the top-right corner of the tool details page, will redirect you to the Point of Connection page of a tool. Please refer to the [POC Page] document for more information.